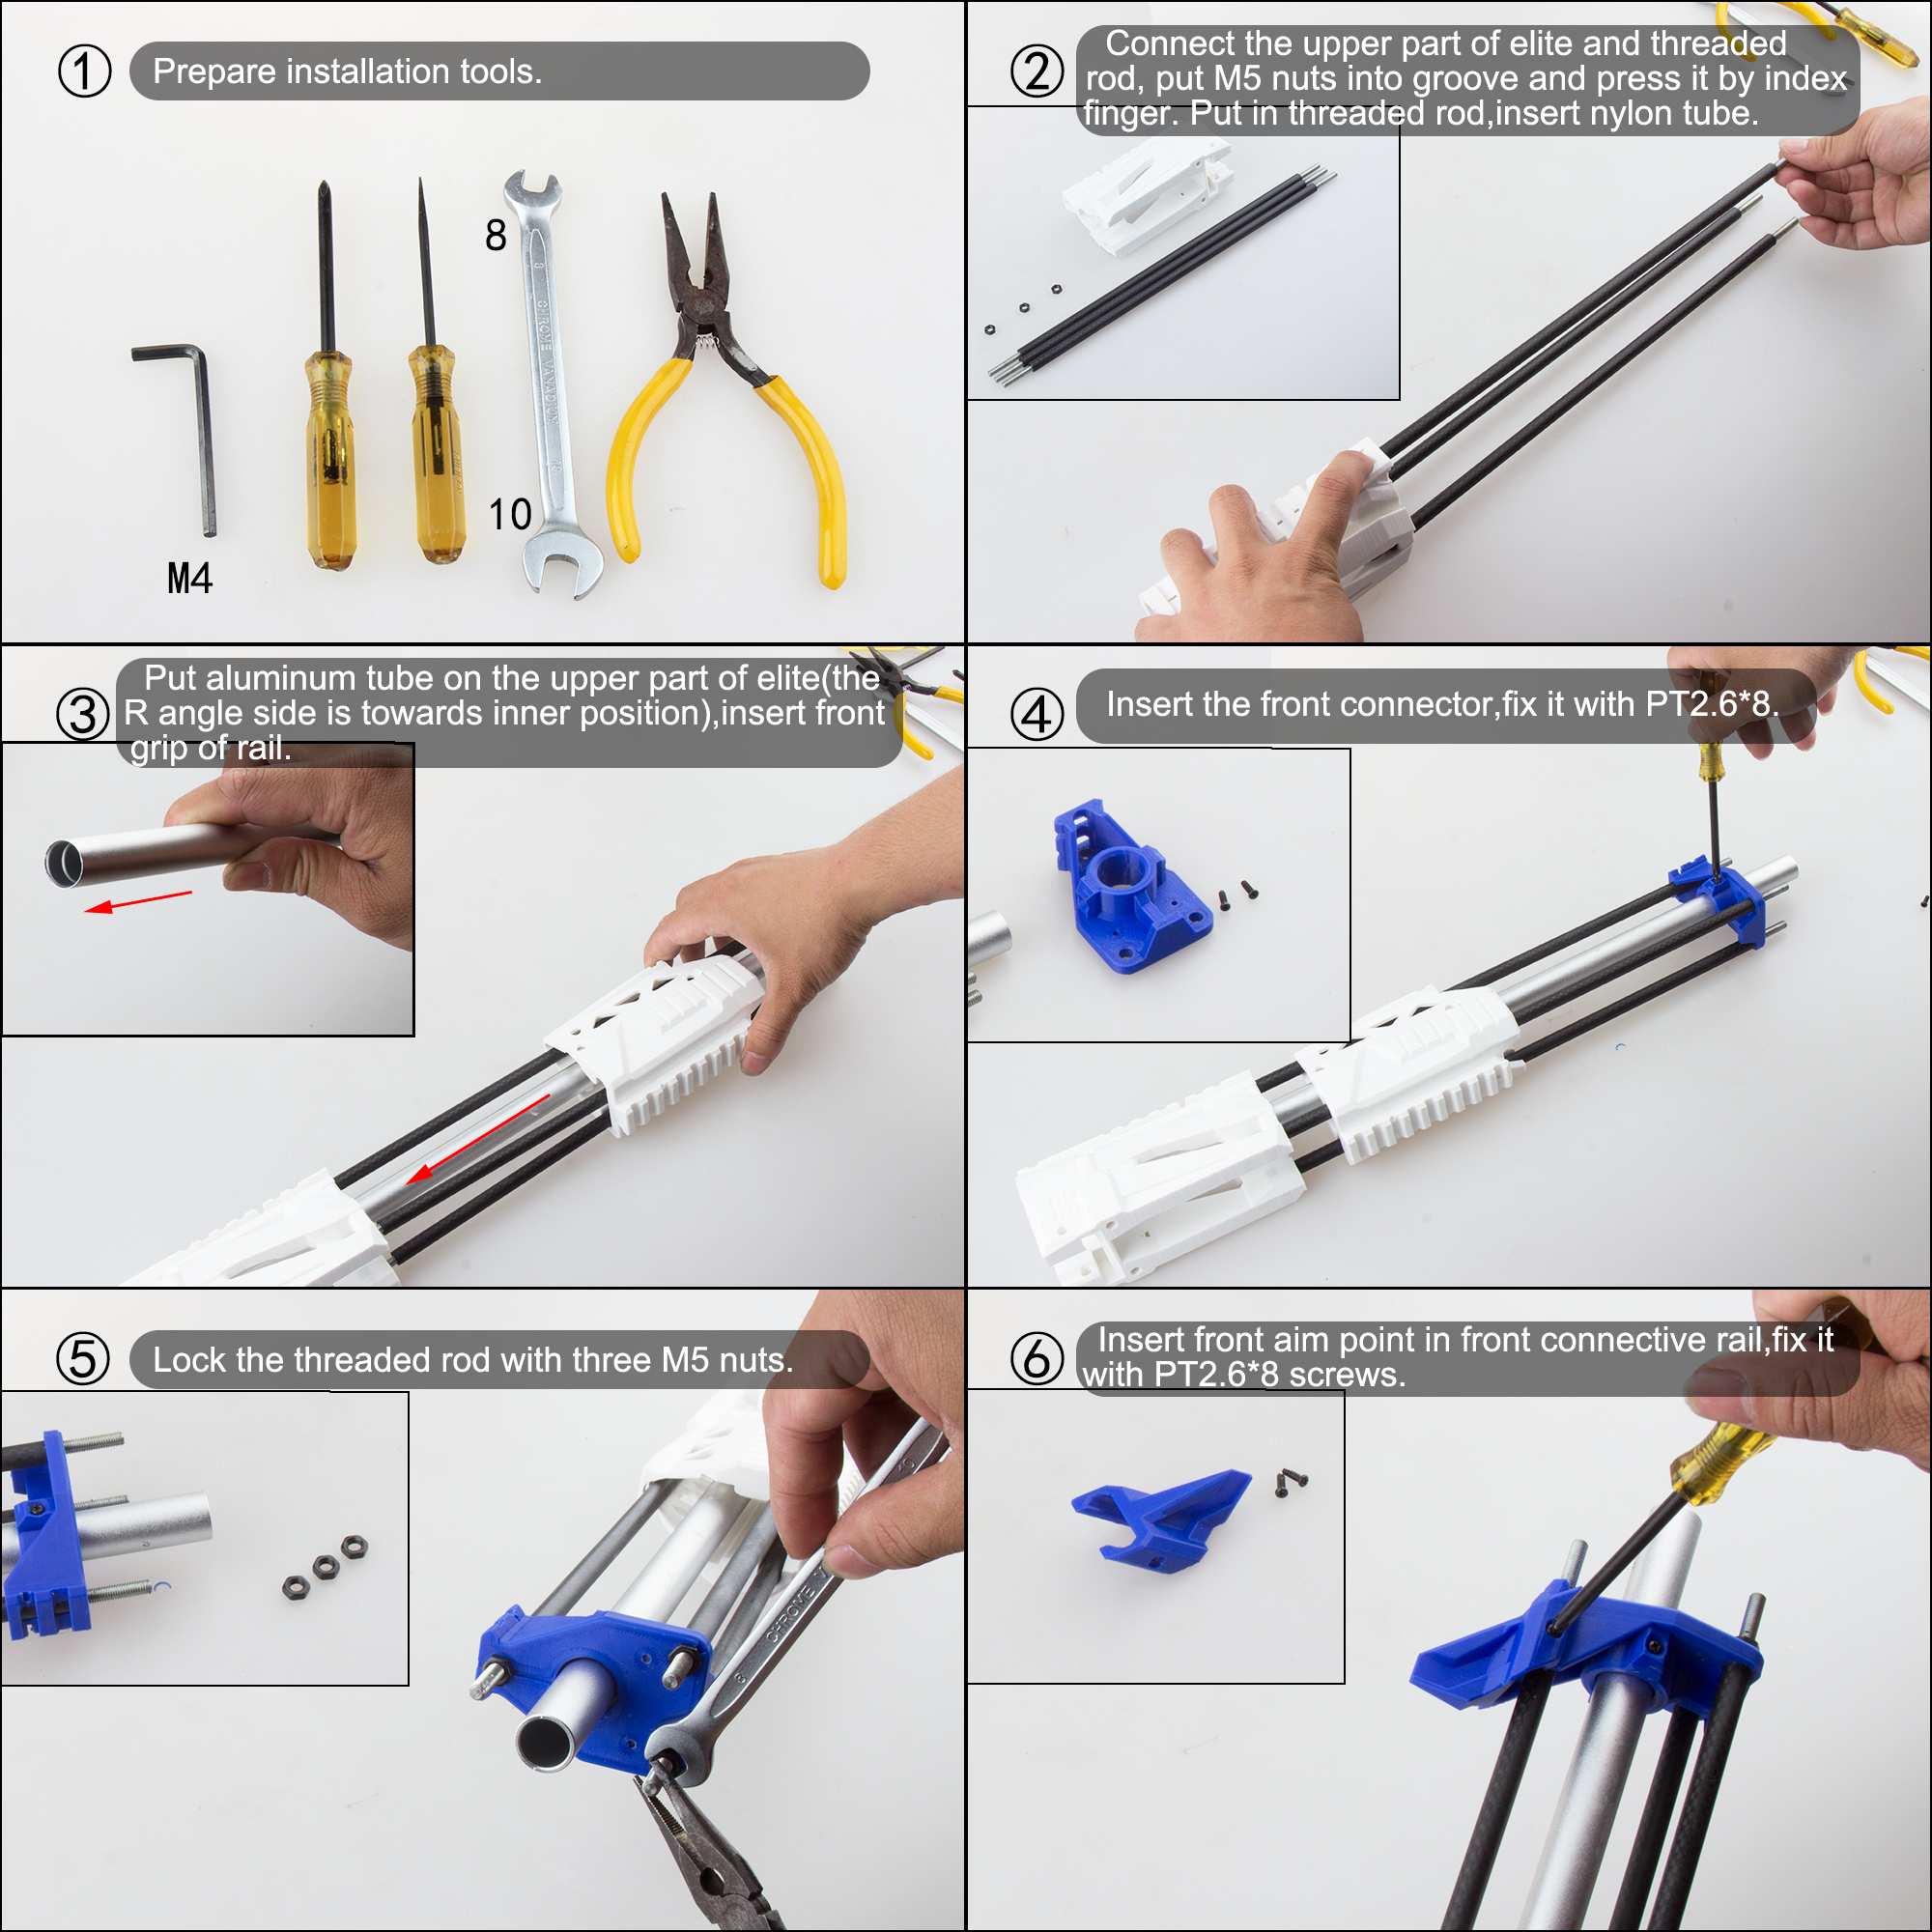
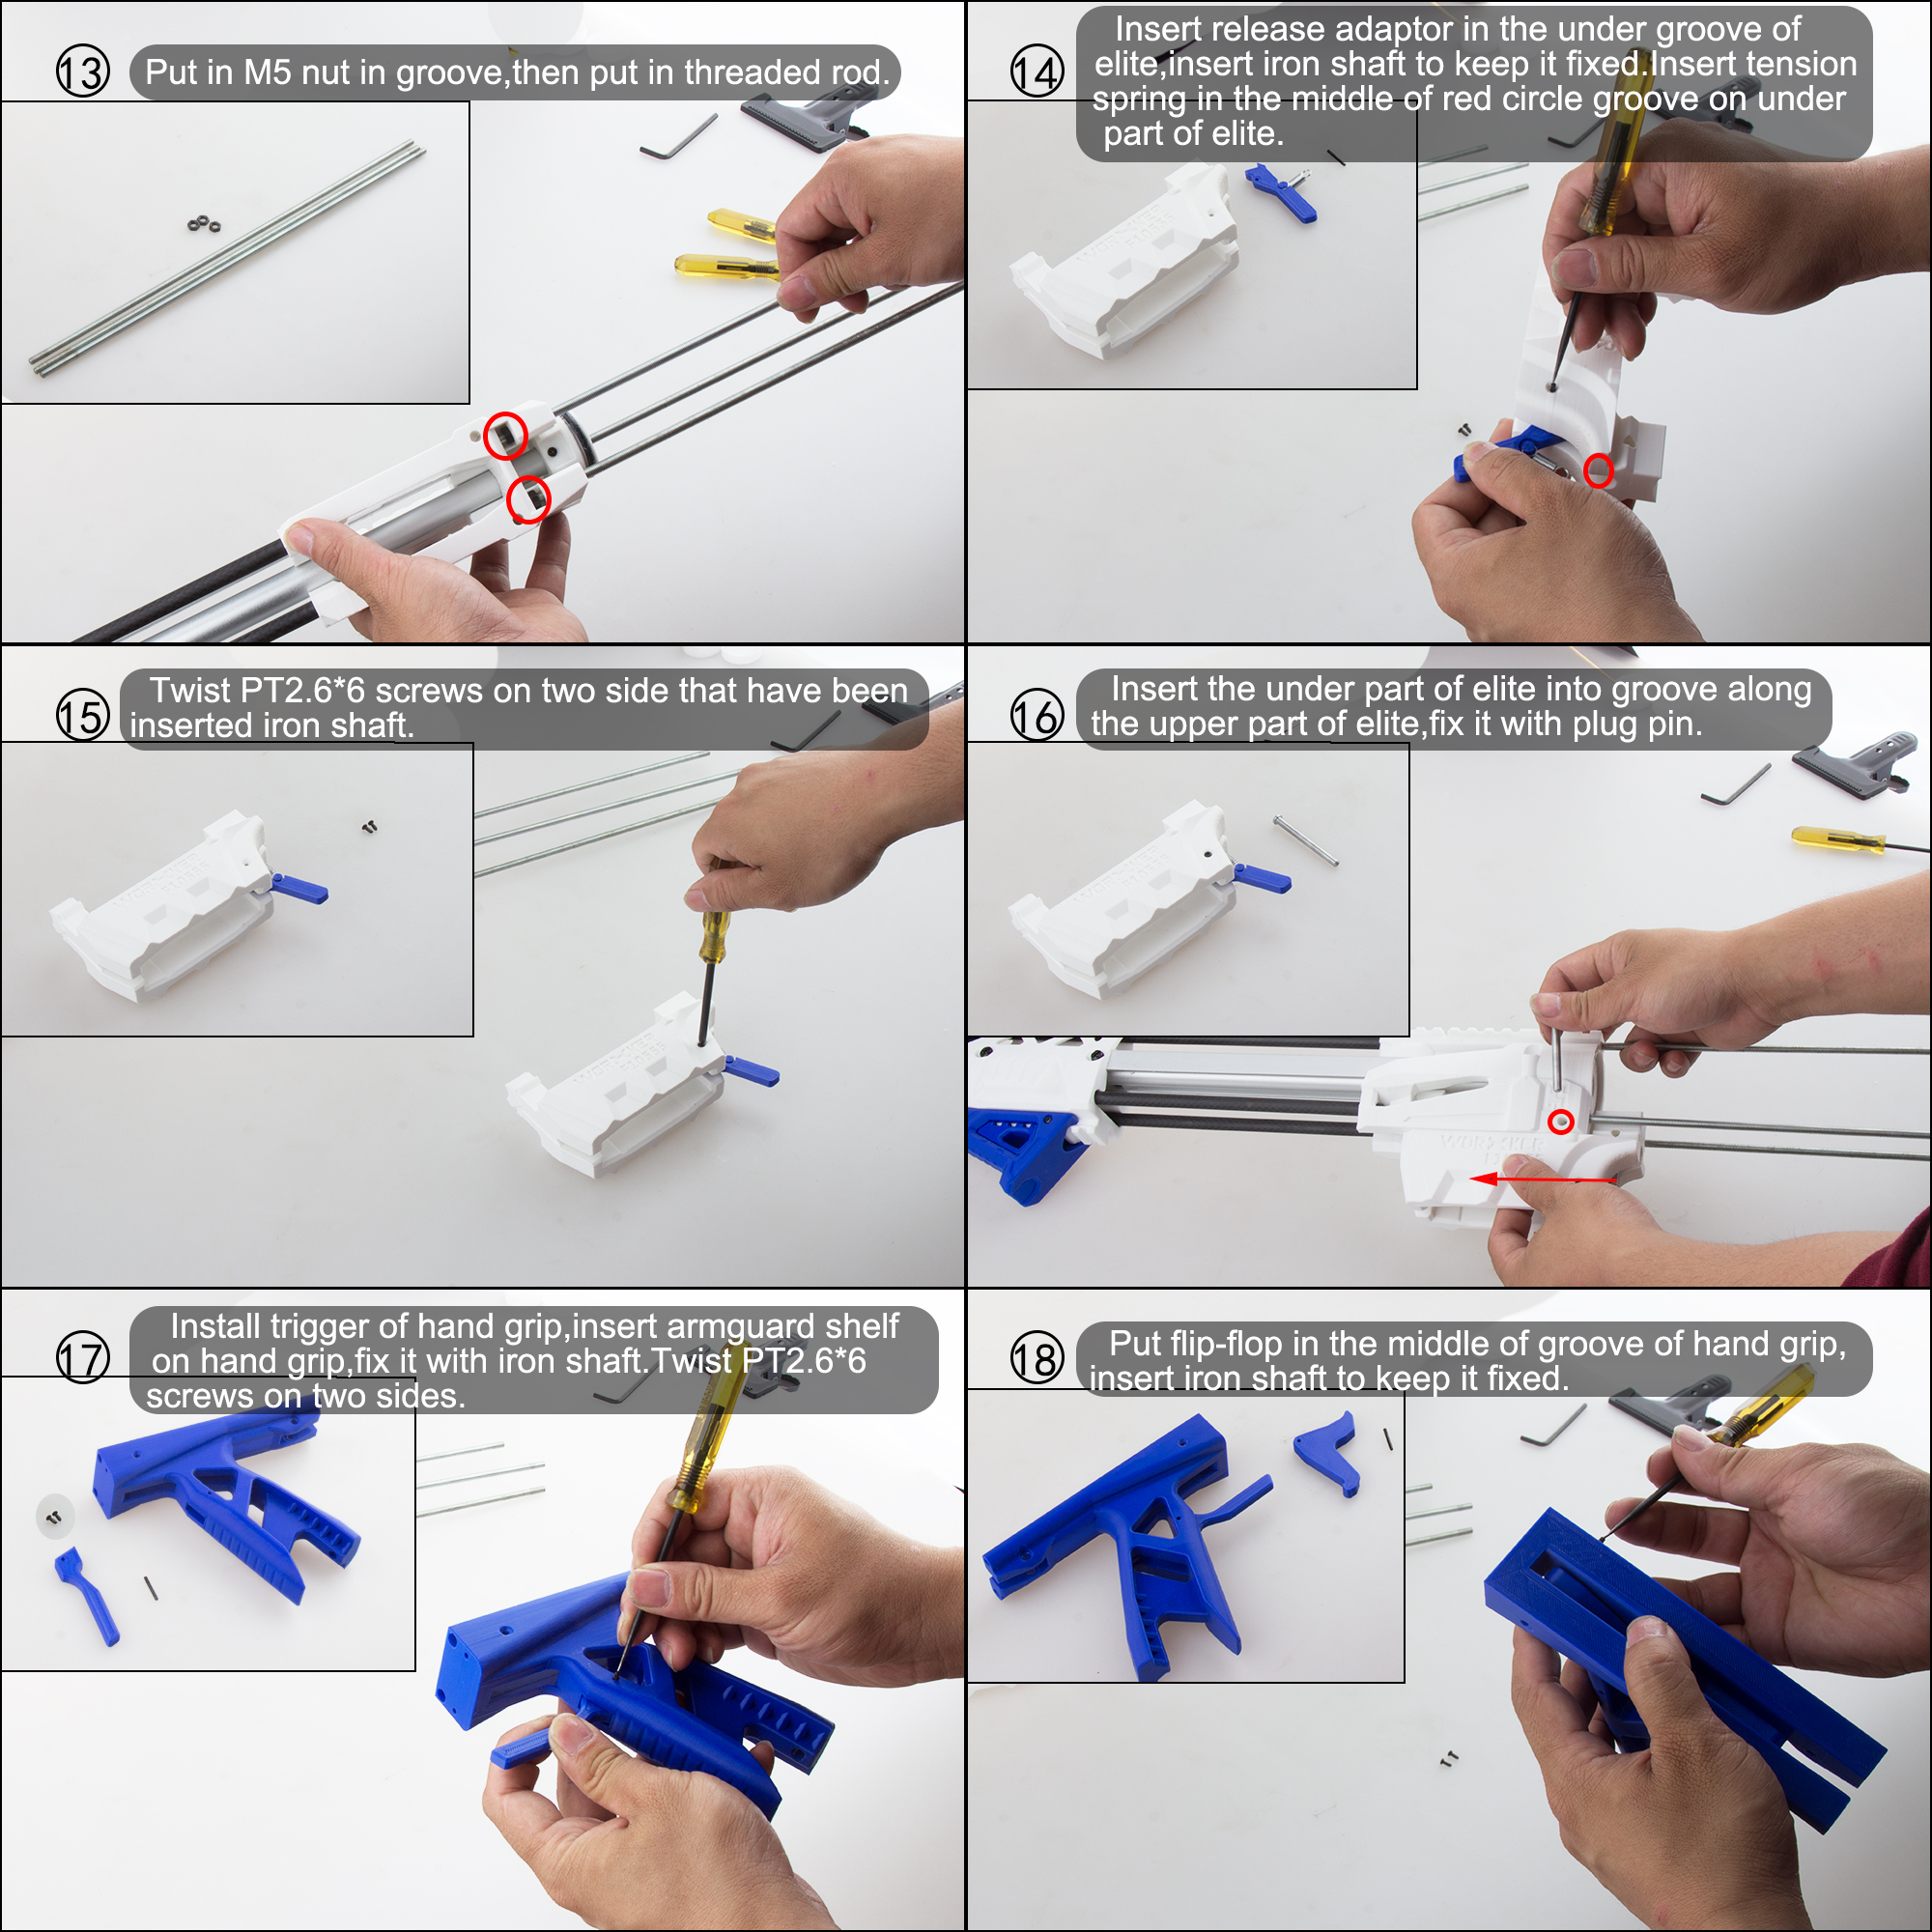
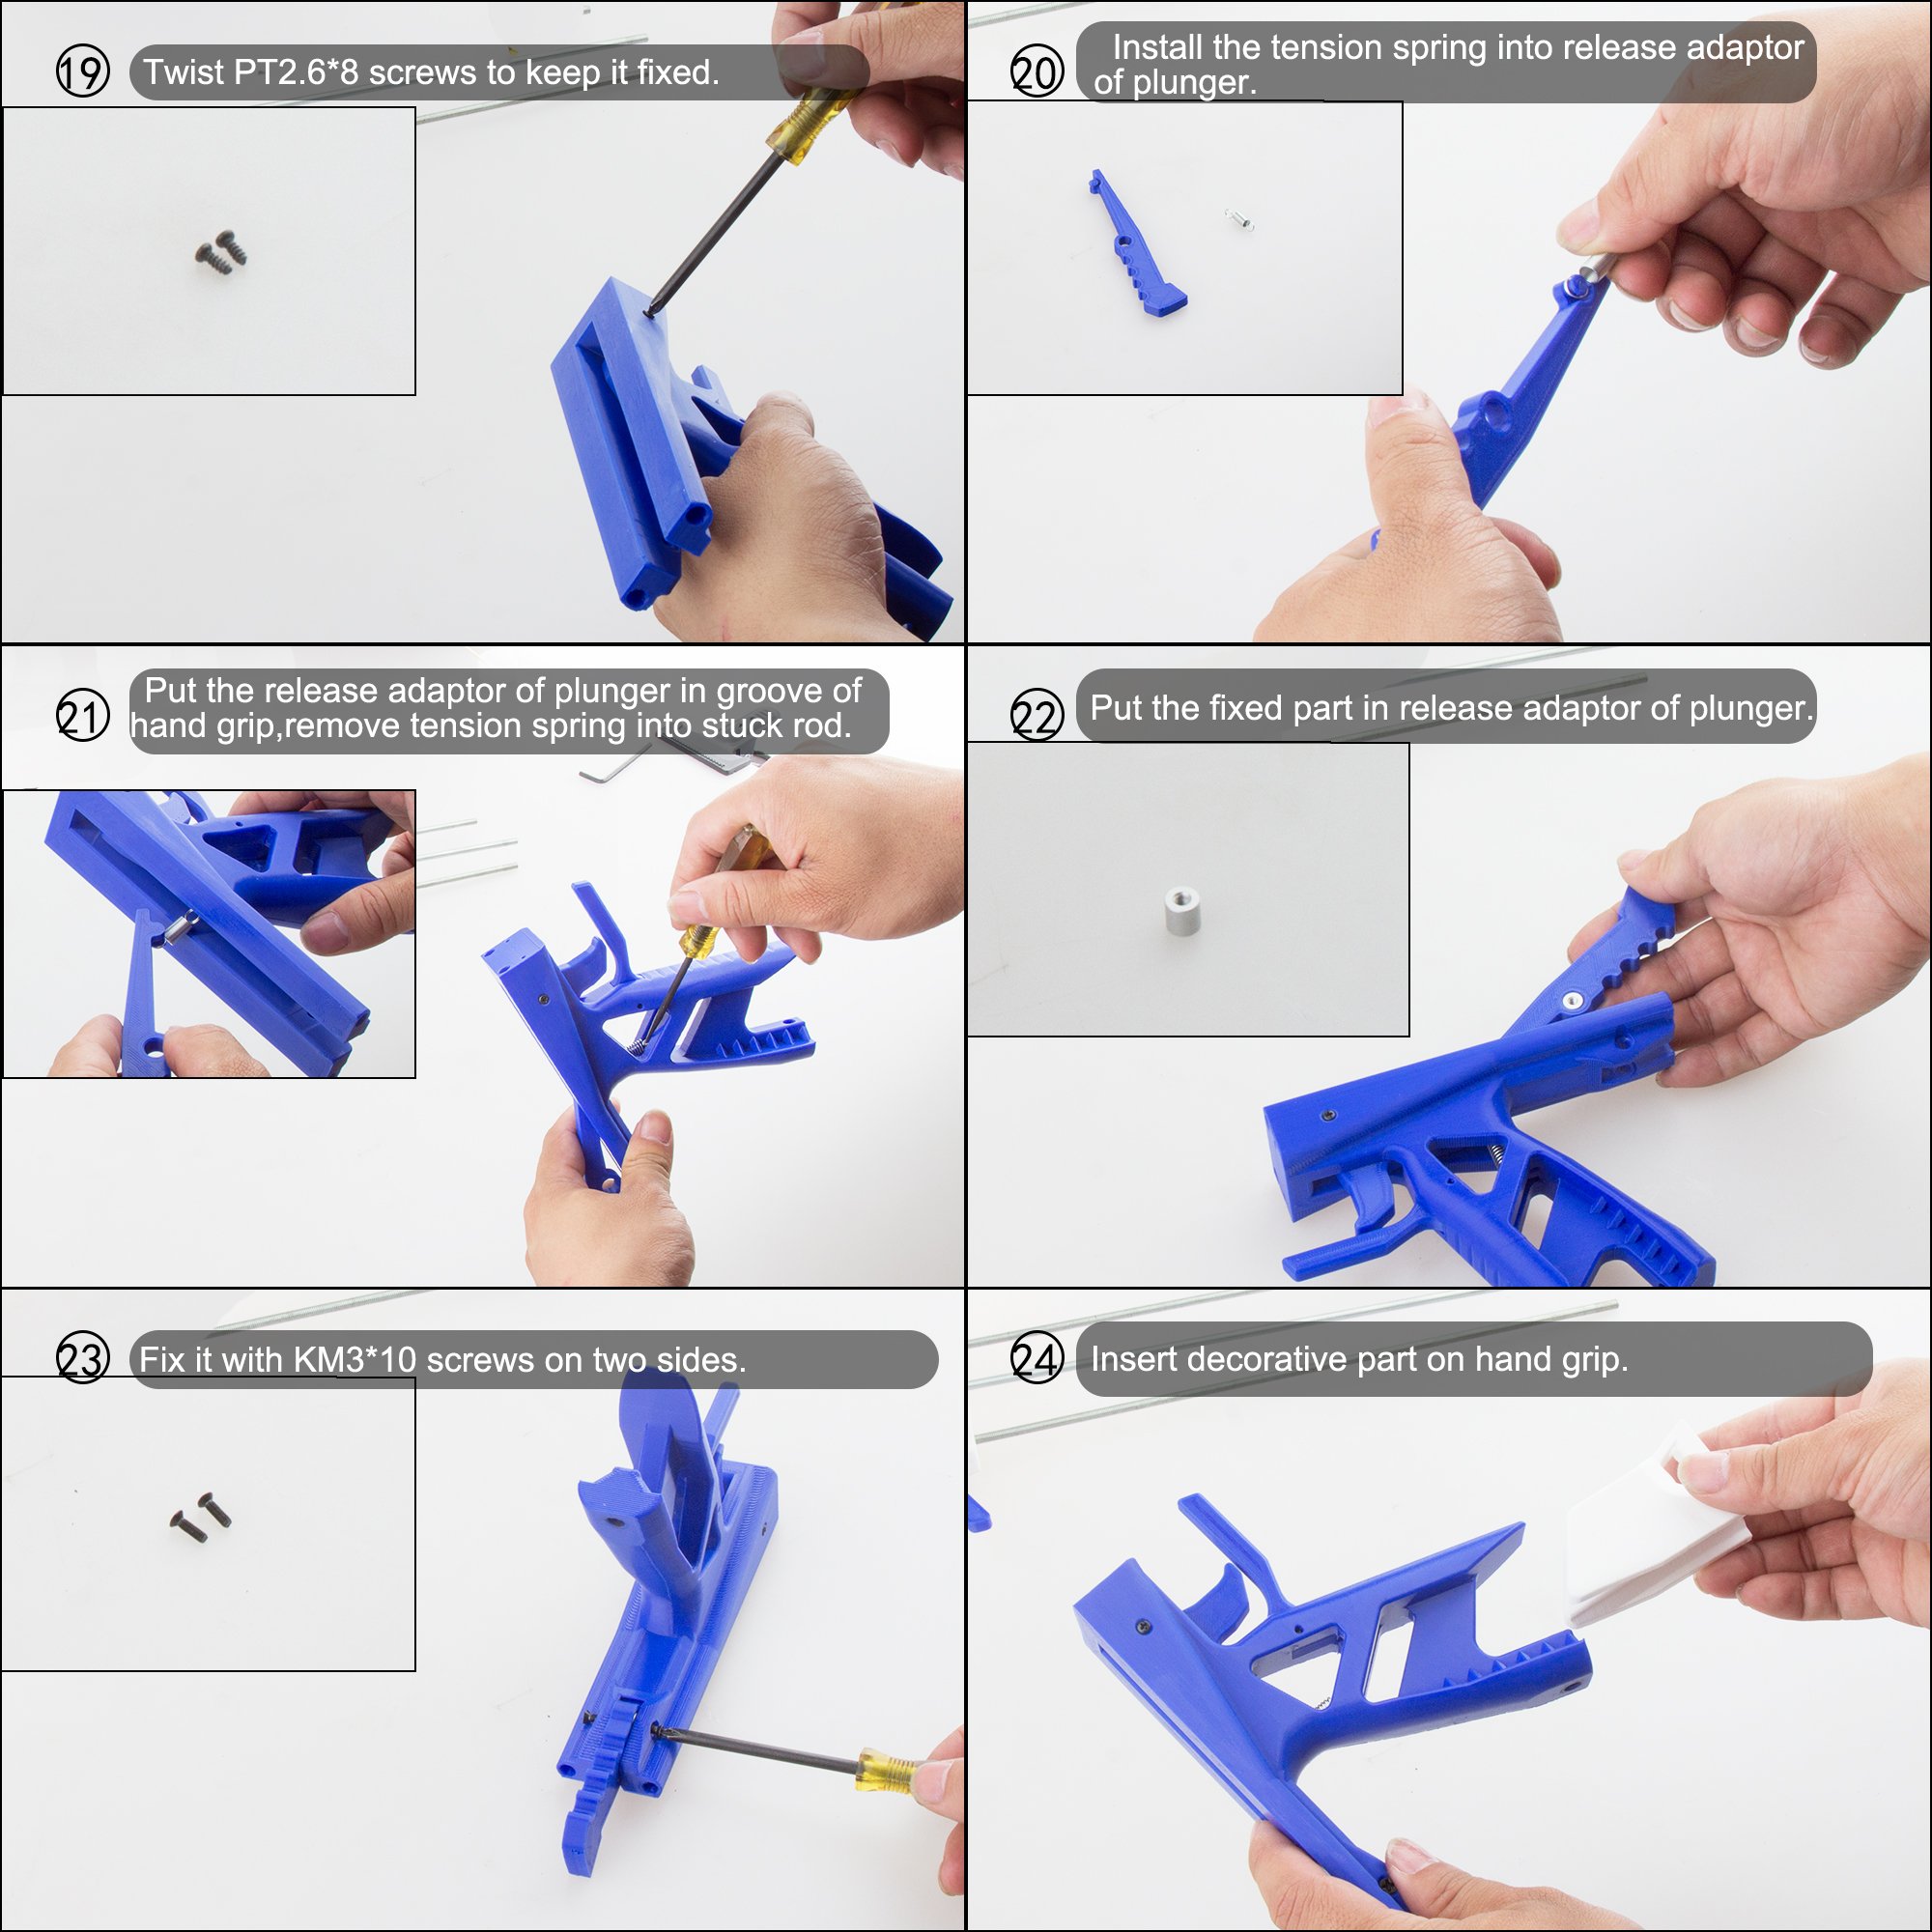
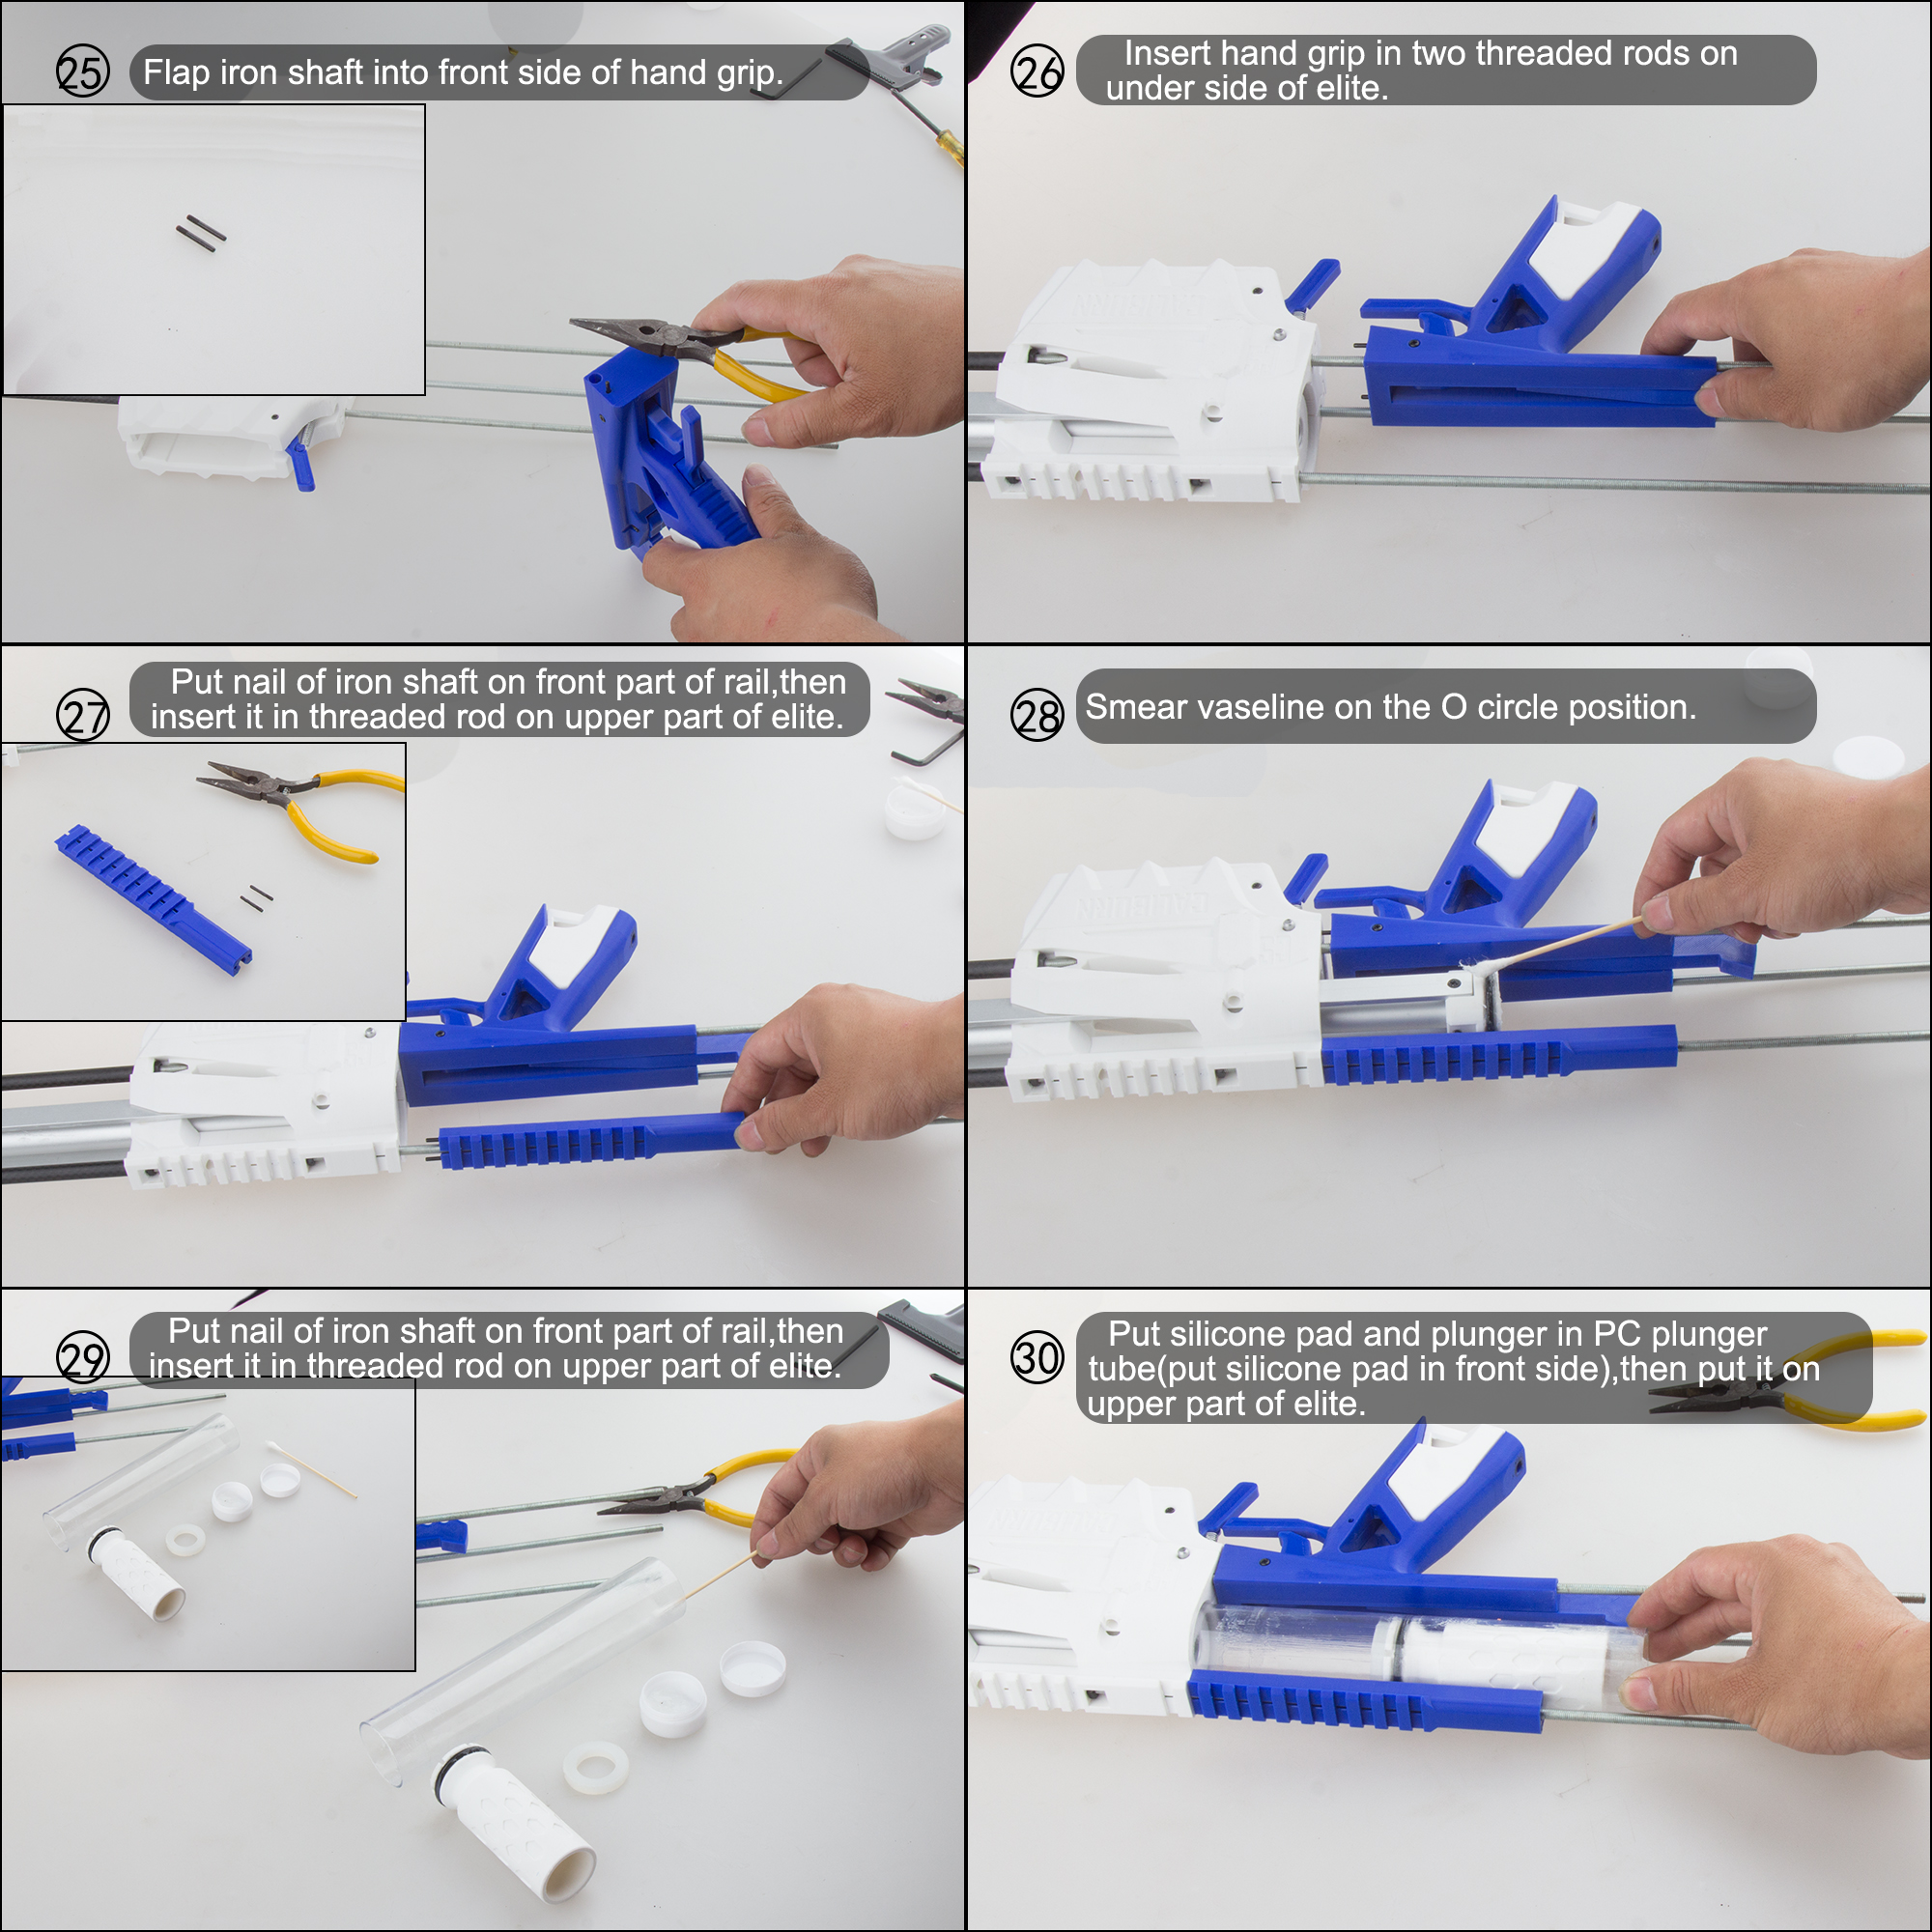
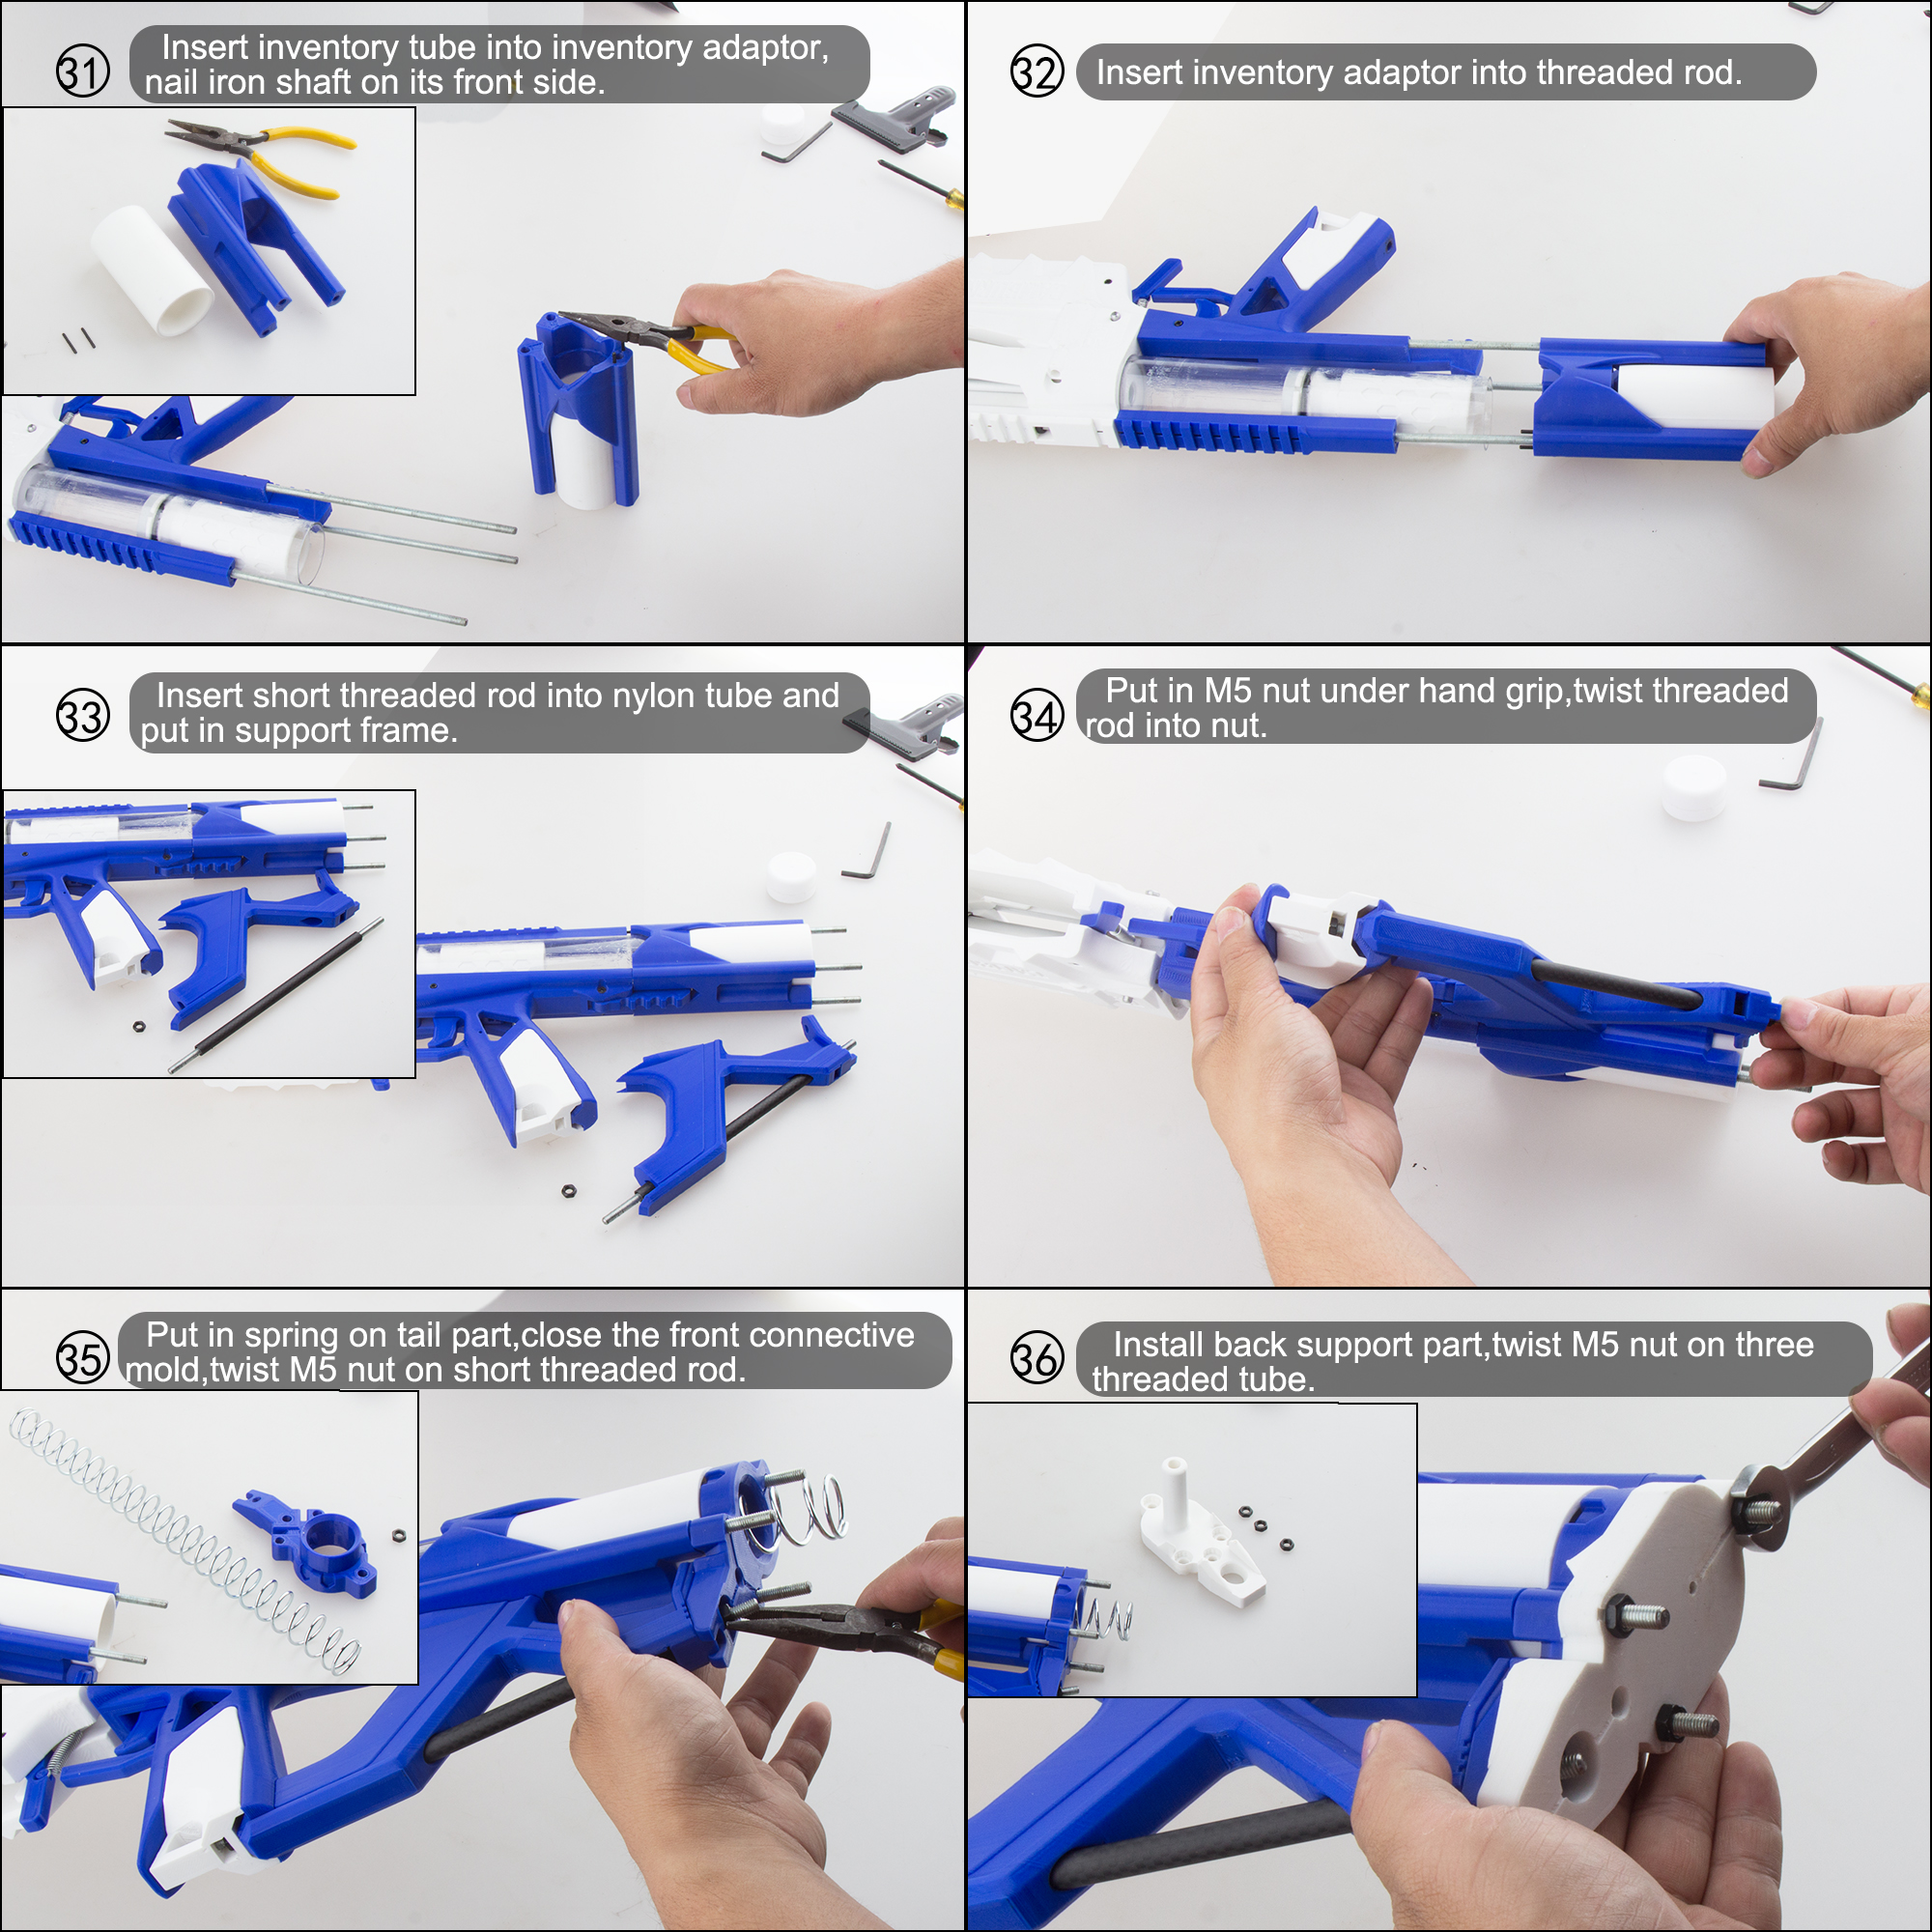
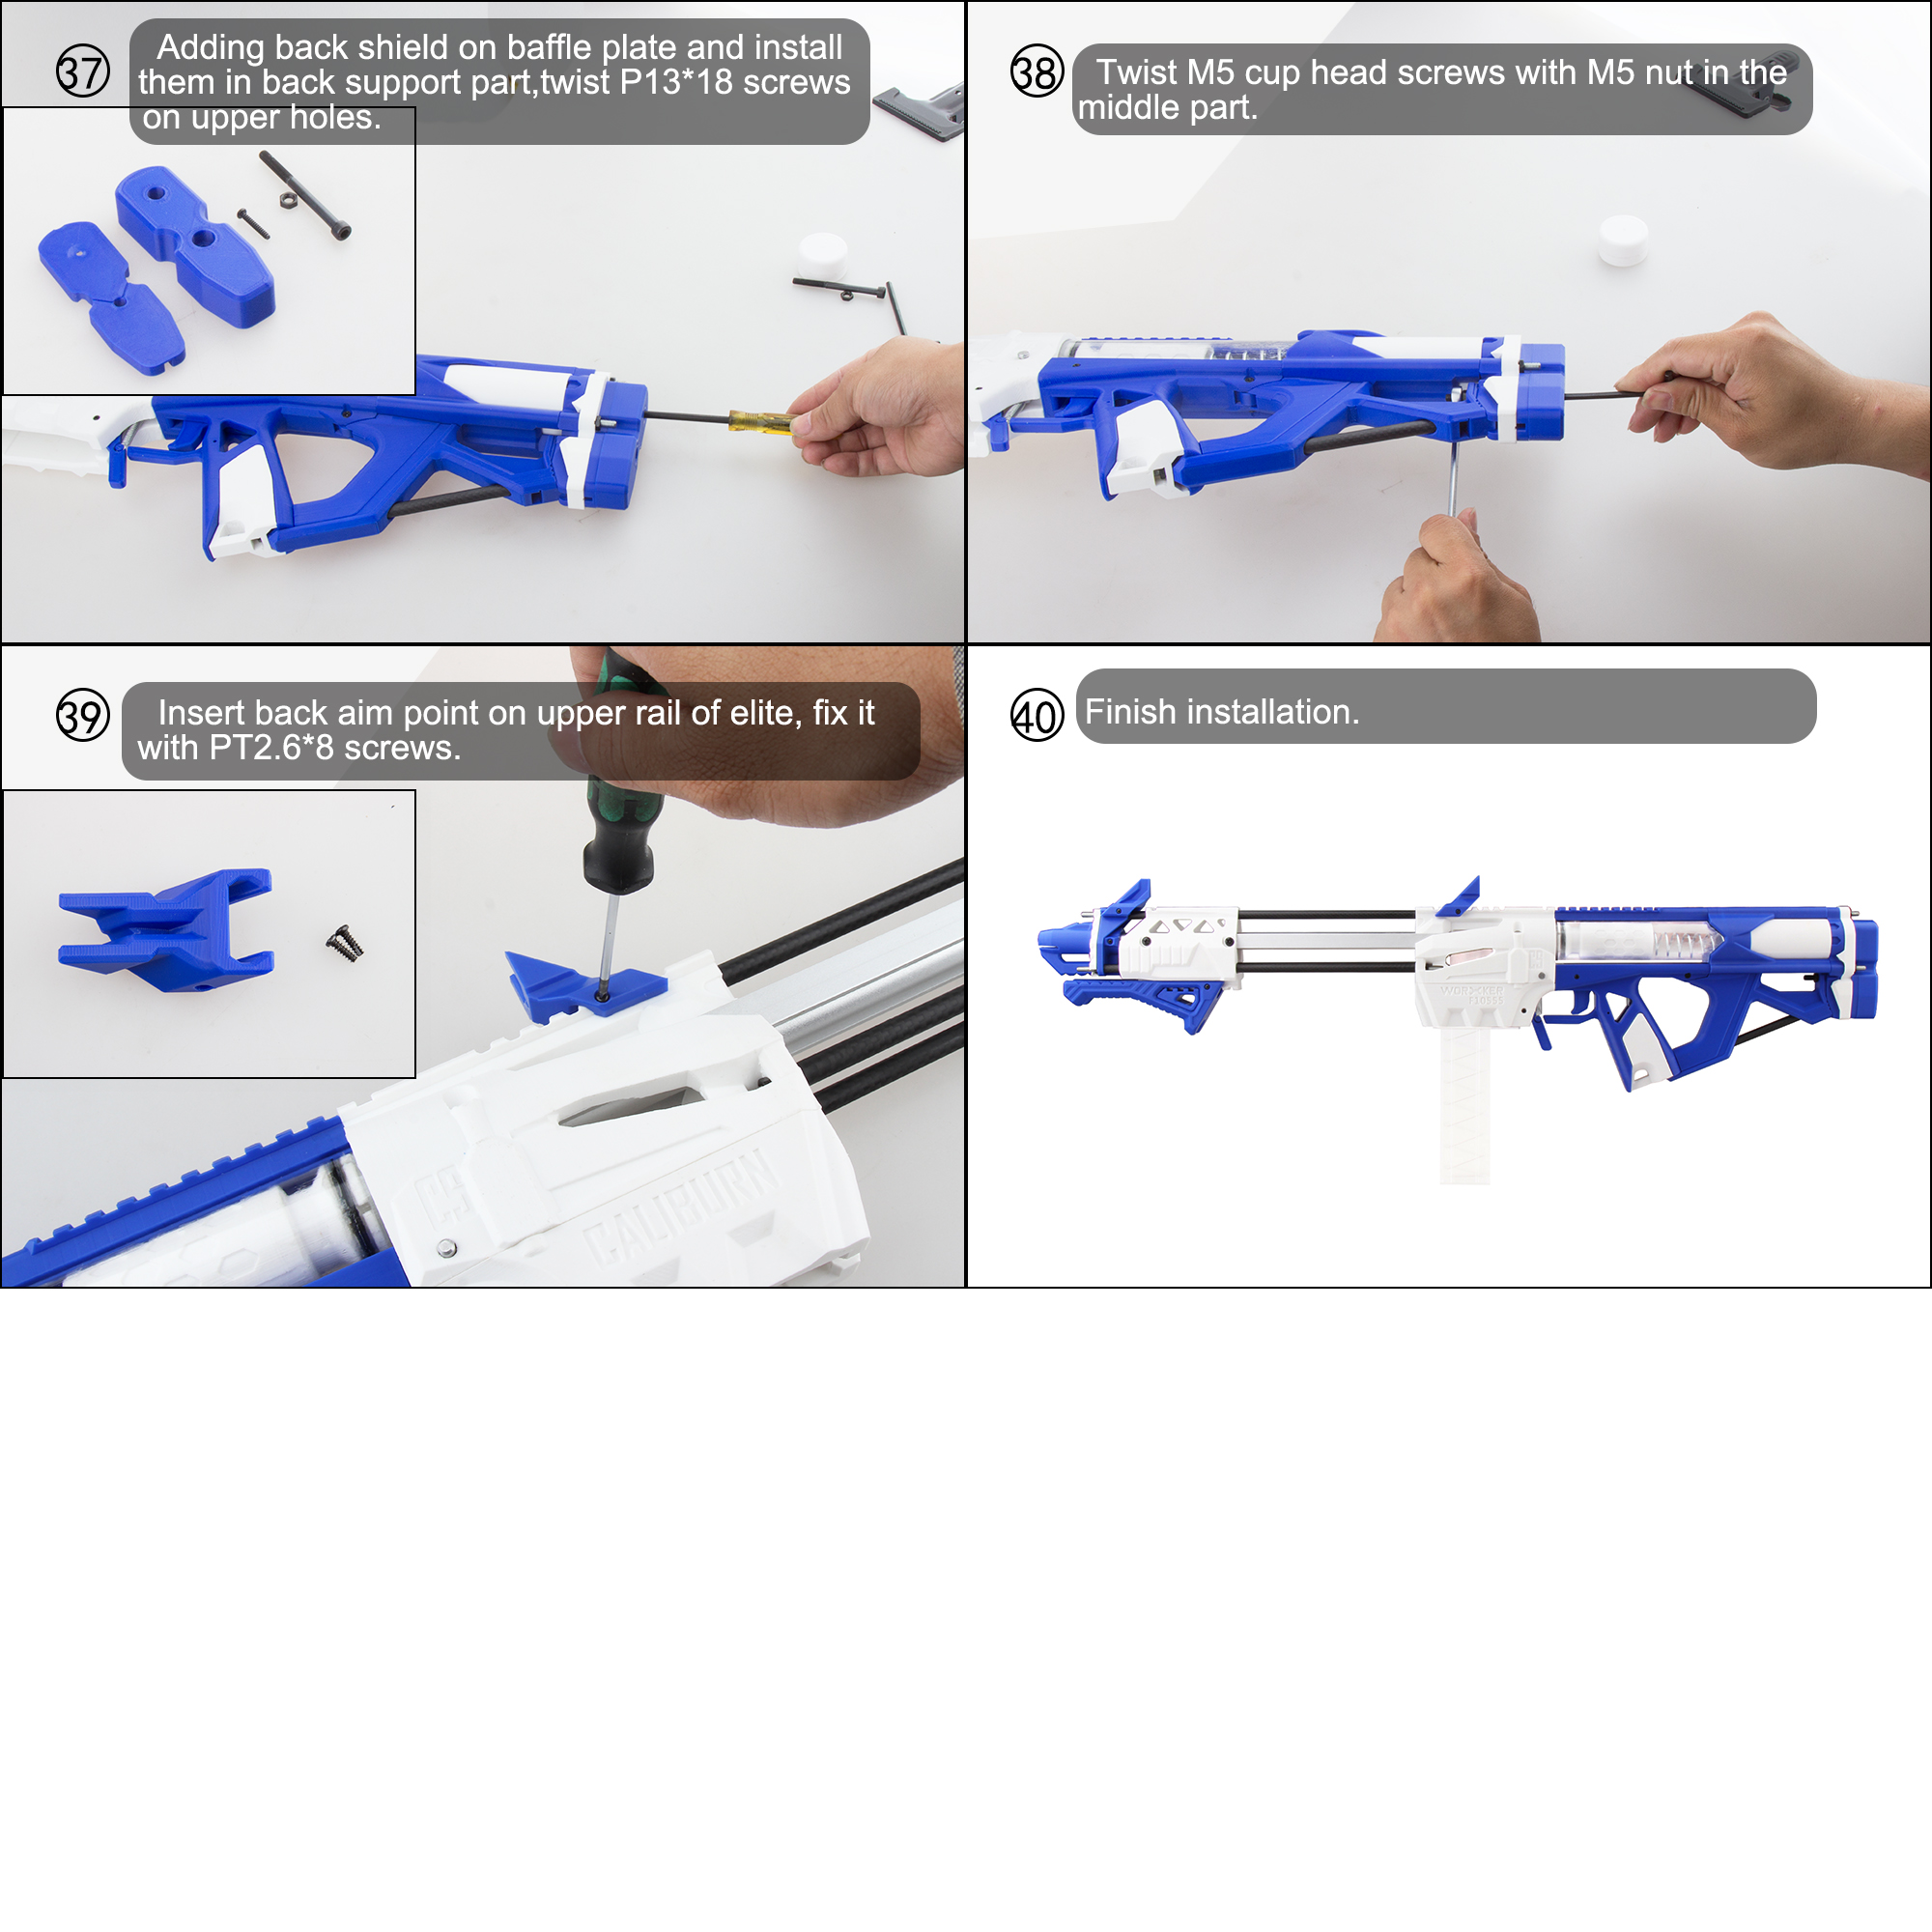
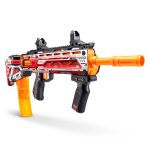
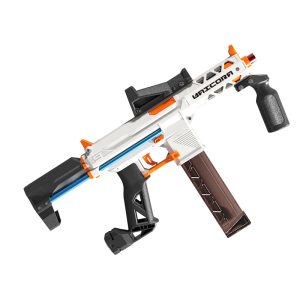
Below you will find assembly instructions for the Worker Caliburn Kit.
Look carefully at the instructions before starting to assemble the blaster.
Some things to keep in mind with assembly:
- There are small aligning-pins included in the kit. Use those to keep the parts well aligned
- The hardware used is metric: therefore the nuts are not locked by the 3D-printed parts. It may help to use double nuts to lock parts in place and prevent them from coming loose.
- 3D printed parts can be fragile: take care when handling parts.
- some holes, especially those for the pins can be a bit thight. Using a drill or file may help to get the pins in.
- Use sufficient lube for the plunger and all moving parts.
- The Worker spring is hard to prime. Consider and try different springs like the K25 and K26 and see what you like.
- Stronger internals are also availble!